When my car refuses to start, I often wonder how to test a starter with jumper cables effectively. It’s surprising that about 30% of vehicle breakdowns stem from starter motor issues. Understanding the starter’s role can save time and money on repairs. Curious about how jump starters work? Dive into the details in our article on how a jump starter works.
A malfunctioning starter typically presents symptoms like clicking sounds or an engine that won’t crank. Recognizing these signs is crucial to tackling the problem before you’re stranded. Let’s explore how we can troubleshoot this vital component with just a few tools and jumper cables.
Can using jumper cables damage my starter or electrical system?
Using jumper cables to test a starter can potentially damage the starter or electrical system if not done correctly. Incorrect connections can lead to short circuits or overload, resulting in component failure.
If jumper cables are connected while the ignition is on, this may create sparks or electrical surges that can harm sensitive electronic components. To avoid such risks, always ensure proper connections and double-check your setup before activating the ignition.
Materials Needed
Before diving into the process of testing your starter with jumper cables, it’s important to gather all the necessary materials. Having the right tools on hand will not only make the task easier but also ensure your safety throughout the process. Here’s a quick rundown of what you’ll need:
- Jumper Cables: Choose quality cables, preferably 16 to 8 gauge, for effective power transfer.
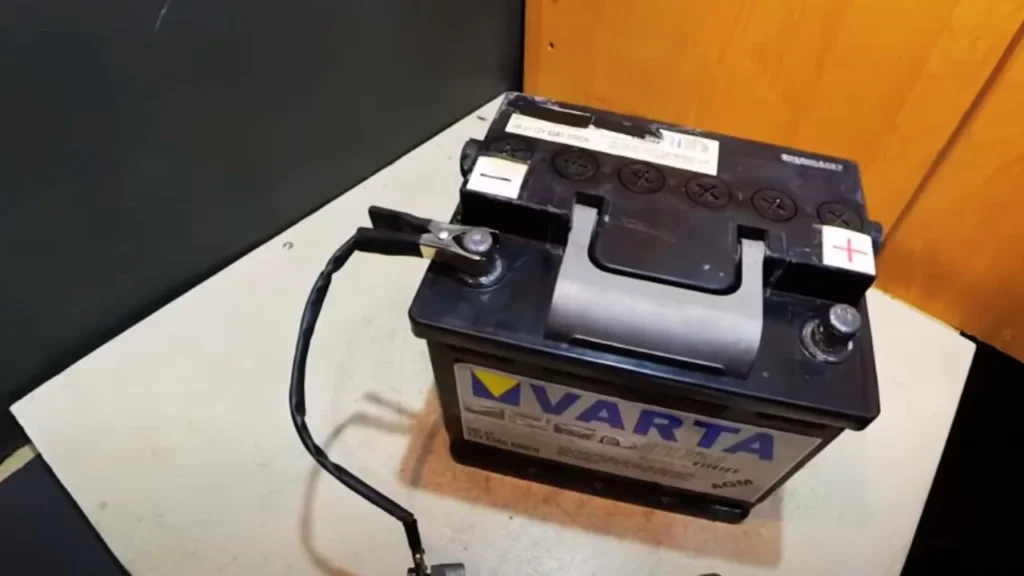
- Good-Condition Battery: Make sure it’s fully charged, ideally around 12 volts, for accurate testing.
- Safety Glasses: Protect your eyes from any debris during the process.
- Basic Hand Tools: Have screwdrivers and wrenches ready for any necessary adjustments.
- Multimeter (optional): Useful for checking battery voltage and ensuring everything is functioning properly.
Initial Checks Before Testing
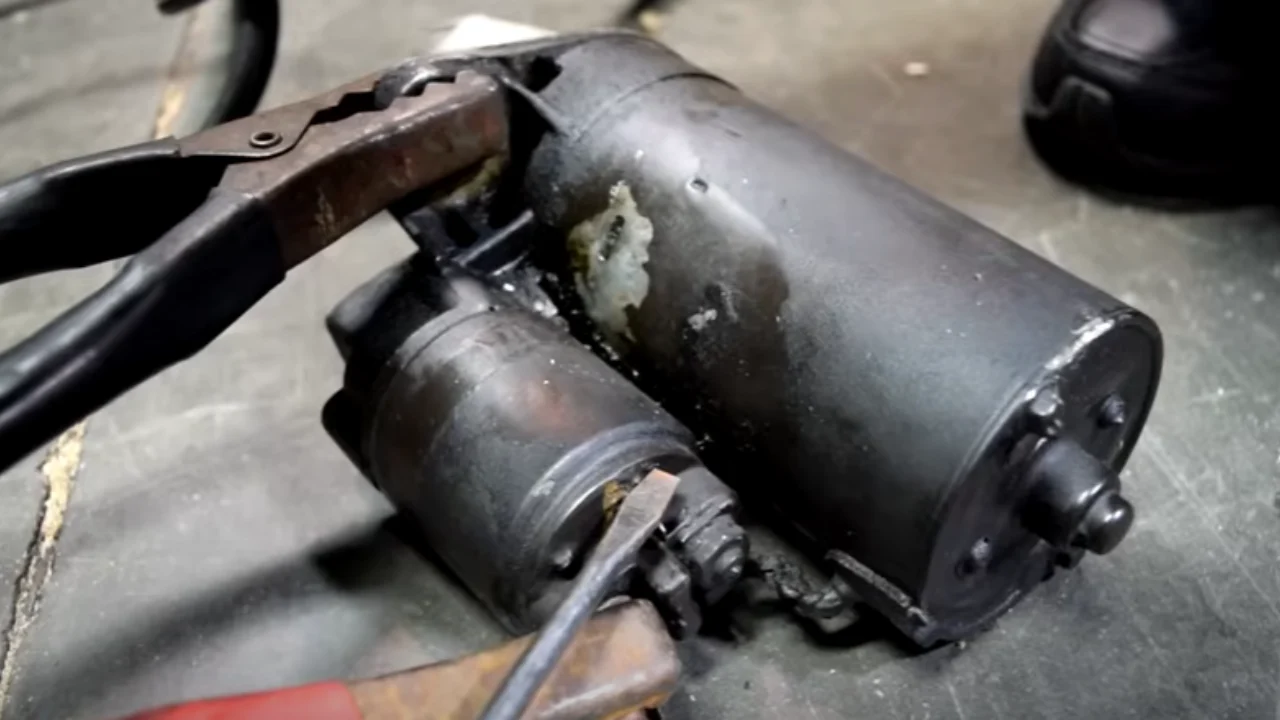
Before diving into testing the starter with jumper cables, I always start with a visual inspection. I check the starter and its wiring for any signs of damage, like frayed wires or loose connections. These issues can prevent the starter from functioning properly and are often easy to fix.
Next, I grab my multimeter to measure the battery voltage. A healthy battery should read around 12.6 volts when the engine is off. If the reading is below 12 volts, it’s time to recharge or replace that battery, as it’s likely contributing to the problem.
Finally, I check all connections at the battery and starter for corrosion or looseness. Corroded connections can lead to voltage drops, affecting the starter’s performance significantly. Ensuring everything is snug and clean helps maintain optimal performance.
Testing the Starter with Jumper Cables
Testing your starter with jumper cables is a straightforward process that can help you diagnose issues efficiently. Whether you choose the on-vehicle or bench testing method, understanding the steps can save you time and money. Let’s explore how to perform these tests and what results to look for.
On-Vehicle Testing Method
The on-vehicle testing method allows you to check the starter without removing it from the vehicle. This process helps identify if the starter is functional by using jumper cables to bypass the electrical system. Here’s how to do it step-by-step:
Steps for On-Vehicle Testing:
- Connect the Red Cable: Start by connecting one end of the red jumper cable to the positive terminal of the battery. Attach the other end to the positive terminal of the starter.
- Attach the Black Cable: Next, connect the black jumper cable to the starter’s casing and the negative terminal of the battery. This ensures a solid ground connection.
- Turn the Ignition: With everything connected, turn the ignition to see if the starter engages and the engine cranks. If it does, your starter is working fine. If you only hear a click or nothing at all, further investigation is needed.
Bench Testing Method
The bench testing method is ideal when you want to test the starter outside of the vehicle. This approach allows for a more thorough examination and can help pinpoint issues more effectively. Here’s how to perform the bench test step-by-step:
Steps for Bench Testing:
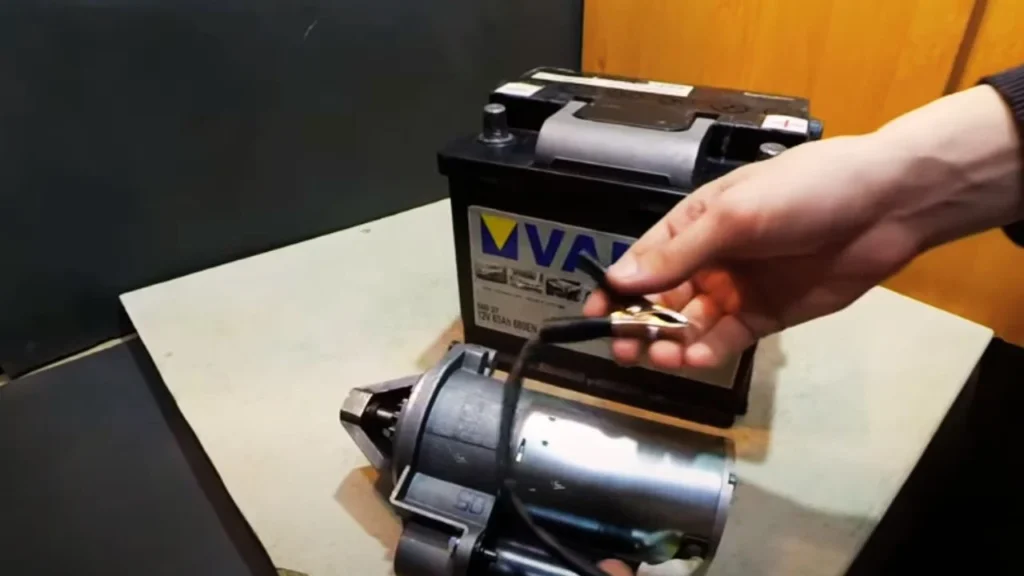
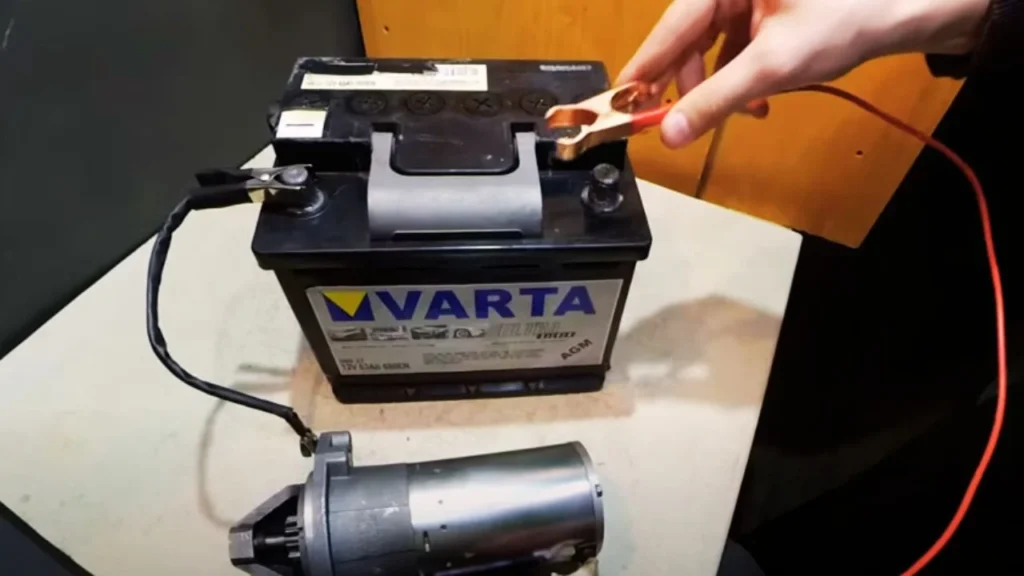
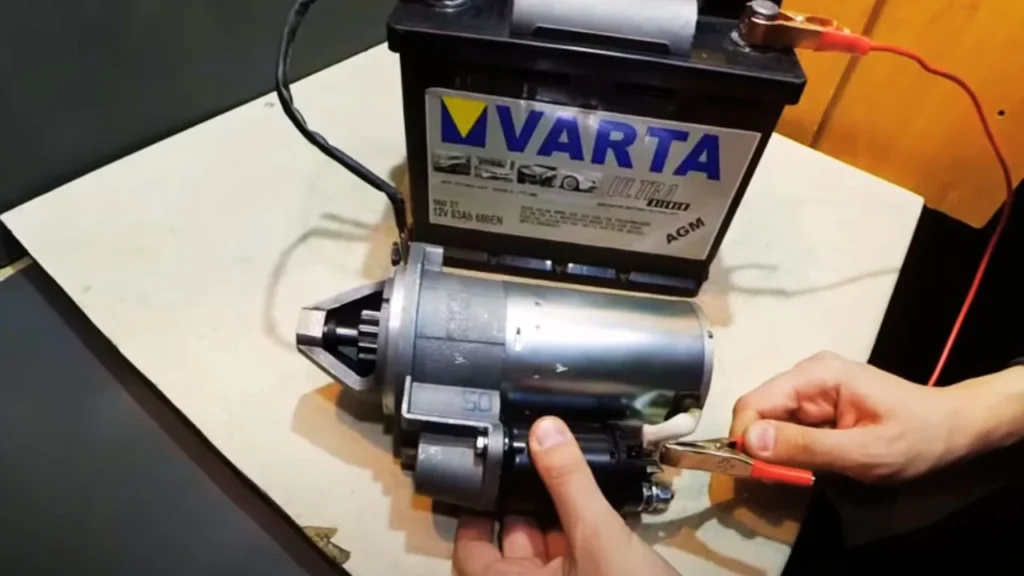
- Remove the Starter: Begin by safely removing the starter from the vehicle and securing it in a vise. This will prevent any movement during the test.
- Connect the Red Cable: Attach one end of the positive jumper cable to the starter solenoid’s positive post. Connect the other end to the positive terminal of a good-condition battery.
- Attach the Black Cable: Now, connect the black jumper cable to one of the starter’s ears to establish a solid ground connection.
- Prepare for Ignition Voltage: Take a short length of wire and connect one end to the small terminal of the solenoid. Briefly touch the other end to the positive battery terminal to supply ignition voltage.
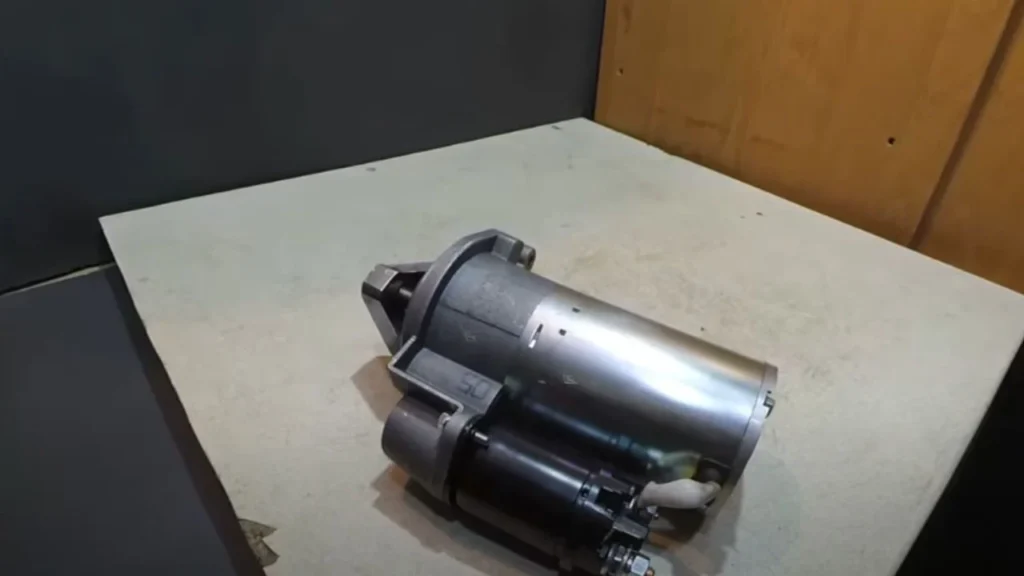
- Observe the Starter: Watch for the starter pinion gear to engage. If it spins quickly, the starter is functional. If it moves slowly or only clicks, further inspection is necessary.
Need a versatile tool? Discover the best battery charger and jump starter combo for ultimate convenience.
Interpreting Results
Testing a starter with jumper cables is straightforward, but interpreting the results can be tricky. Here’s how to understand what the reactions of your starter are telling you.
Checking for Starter Engagement
Once I’ve connected the jumper cables, it’s time to see how the starter performs. If the starter spins freely and engages, that’s a great sign—my starter is likely functional. In most cases, a properly working starter will begin to crank the engine within a couple of seconds.
Listening for Clicking Sounds
However, if I only hear a clicking noise, it might indicate an issue with the solenoid or the connections. This sound usually means the solenoid is attempting to engage, but there isn’t enough power getting through. It’s a good idea to double-check all my connections and ensure they are clean and tight.
No Sound at All
If I hear nothing at all, that’s a red flag. This could mean the starter is completely failed, or there’s an issue with the wiring. It’s essential to rule out other components, like the battery or ignition switch, before concluding the starter is the problem.
By systematically interpreting these results, I can effectively diagnose whether my starter needs repair or replacement. A well-functioning starter can help save me from future headaches and costly repairs down the road.
Need to jump-start your car alone? Follow our complete guide on how to jump-start a car by yourself.
Troubleshooting Common Issues

Troubleshooting starter problems can be a bit daunting, but understanding common issues makes it easier. Often, the problem lies in something simple, like a loose connection or a faulty solenoid. Let’s dive into some practical steps to diagnose and resolve these issues effectively.
Check Connections
When troubleshooting starter issues, the first step is checking the connections. Surprisingly, about 40% of starter problems are due to corroded or loose connections. Cleaning the battery terminals and starter wires can often resolve these issues.
Test the Solenoid
If the connections look good but the starter isn’t engaging, it might be the solenoid. Testing the solenoid can quickly pinpoint the issue. Connect a multimeter to the solenoid’s control terminal; if it shows under 12 volts, consider replacing it.
Evaluate the Battery’s Condition
Don’t overlook the battery’s condition in this process. A battery that tests under 12 volts likely won’t provide enough power to start the engine. I recommend recharging or replacing it to avoid further headaches.
Inspect the Starter Itself
If all else fails and the starter still won’t engage, the issue may be internal. Problems like worn brushes or a damaged armature could be at play. If you’re unsure about inspecting these parts, consulting a professional is always a smart choice.
Final Words
Learning how to test a starter with jumper cables can save you time and money on potential car repairs. By following the steps outlined, you can diagnose common starter issues effectively.
Remember, whether it’s checking connections, testing the solenoid, or evaluating the battery, a little knowledge goes a long way. If you’re ever unsure, don’t hesitate to consult a professional to ensure your vehicle remains in top shape for the road ahead. Looking for jump starters with an AC outlet? Check out our top 6 best car jump starters with an AC outlet for 2024.
FAQ’s
What common mistakes should I avoid while testing the starter?
When testing a starter, it’s crucial to avoid common mistakes that could lead to damage or inaccurate results. First, ensure the vehicle’s ignition is off before connecting jumper cables; connecting while the ignition is on can create sparks.
Second, double-check the polarity of the connections to prevent short circuits. Additionally, using cables that are too thin can result in overheating, so always opt for heavy-duty cables.
Lastly, don’t skip inspecting the battery and connections first, as a significant number of starter issues stem from poor connections. Following these precautions can lead to a safer testing experience.
How often should I perform maintenance on my starter system?
To maintain a healthy starter system, it’s advisable to perform routine checks every 6 to 12 months. This frequency allows you to identify any signs of wear, corrosion, or loose connections before they become serious issues.
Regularly inspect the battery terminals and cables for corrosion, which can hinder performance. Additionally, if you notice symptoms like slow cranking or unusual noises when starting, conduct a thorough check immediately.
Keeping an eye on your starter system not only extends its lifespan but also ensures reliable vehicle operation, especially in extreme weather conditions.