Do you know how does a jump starter work? A jump starter is a handy tool that can save you when your car battery dies. Imagine finishing a long day of errands or coming back from a trip, and your car just won’t start. This is where a jump starter comes in. Instead of waiting for help or asking a stranger, you can use a jump starter to get your car running again quickly and easily. It’s like having a portable power bank, but for your car’s battery!
What is a Jump Starter?
A jump starter is a portable device that helps start your car when the battery is dead. It’s similar to using jumper cables, but the big difference is that you don’t need another car to help you. The jump starter provides the power needed to start your car’s engine on its own.
There are two main types of jump starters: portable jump starters and traditional jumper cables. Portable jump starters are small, battery-powered devices that you can keep in your car. Traditional jumper cables, on the other hand, require a second vehicle to provide power.
Types of Jump Starters
There are a few types of jump starters, and knowing which one is right for you can make a big difference:
- Portable vs. Traditional Jump Starters:
Portable jump starters are battery-powered units that are small enough to carry in your car. They are ready to use whenever you need them. Traditional jump starters require another vehicle to connect the cables to, which can be a hassle if there is no other car around. - Lithium-Ion vs. Lead-Acid Battery Jump Starters:
Jump starters come with different types of batteries inside. The most common are lithium-ion and lead-acid.
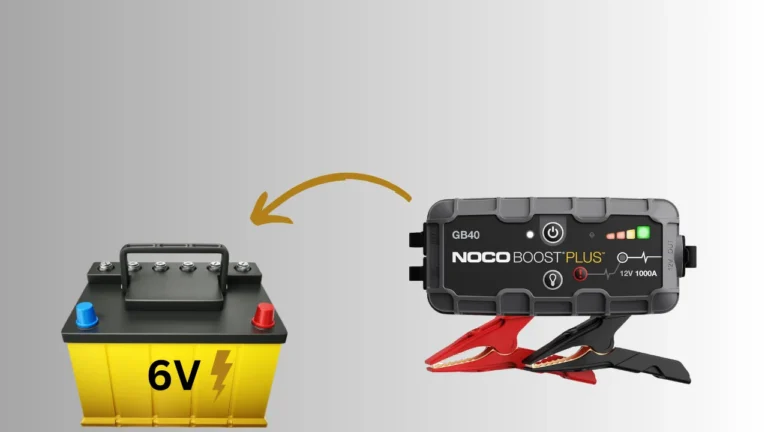
| Lithium-ion jump starters are lightweight, compact, and hold a charge for a long time. They are ideal for keeping in your car for emergencies. | Lead-acid jump starters are heavier and bulkier, but they are often more powerful and can handle larger engines. |
How Does a Jump Starter Work?
A jump starter is like a small, powerful battery that helps start your car when its battery is dead. It works by giving a quick burst of electricity to your car’s battery, which is enough to turn the engine on. Let’s break down how it all works in simple terms:
The Science Behind Jump Starters
A jump starter has its own battery inside, which stores electricity. When your car’s battery is dead, the jump starter sends this stored electricity to the car’s battery through the jumper cables. This power is just enough to “wake up” the car battery and get the engine running. Once the engine starts, the car’s own charging system takes over, and the jump starter is no longer needed.
“Remember, a jump starter doesn’t actually charge your car battery. It only provides enough power to start the engine. After starting, the car needs to keep running so its alternator can recharge the battery fully.”
Main Components of a Jump Starter-2
- Battery Cells:
Lithium-ion batteries: Lighter, hold a charge longer, common in portable jump starters.
Lead-acid batteries: Heavier, found in more powerful models.
- Clamps and Cables:
- Two clips (usually red and black) that connect to the car’s battery terminals.
- Red clamp: Connects to the positive (+) terminal.
- Black clamp: Connects to the negative (-) terminal.
- These cables transfer electricity from the jump starter to the car battery.
Section 3: Step-by-Step Guide to Using a Jump Starter
How to Use a Jump Starter: A Simple Guide
Using a jump starter is straightforward, but it’s important to follow the steps correctly to avoid any damage or accidents. Here’s a simple guide to help you safely jump-start your car.
This is the most common way to use a jump starter. Here’s what you need to do:
Step 1: Prepare the Jump Starter

Make sure your jump starter is fully charged. Check the charge level indicator to confirm it’s ready to use.
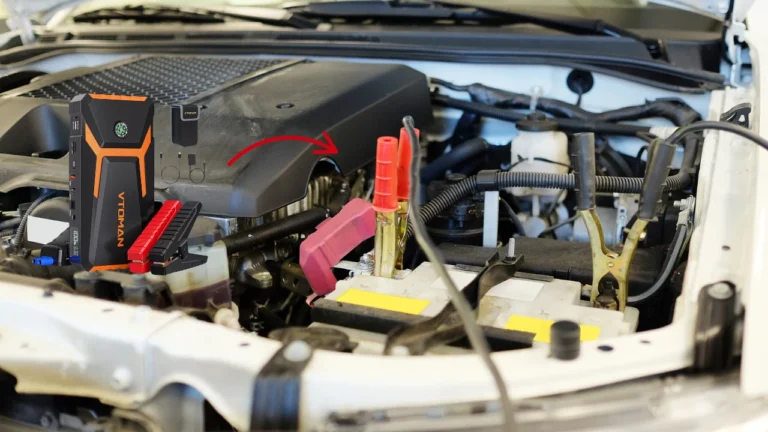
Step 2: Connect the Clamps to the Battery

Open the car hood and locate the battery. Attach the red clamp to the positive terminal (marked with a ‘+’) and the black clamp to the negative terminal (marked with a ‘-’).
Step 3: Connect the Clamps to the Jump Starter

Plug the jumper cable into the jump starter. Ensure the connection is secure.
Step 4: Start Your Vehicle

Wait for any indicator light on the jump starter to show it’s ready (usually a green light). Then, start your vehicle. If it doesn’t start, wait a few moments and try again.
Step 5: Disconnect the Cables

Once the car starts, disconnect the cables in reverse order. Remove the black clamp first, then the red clamp, and finally unplug the jumper cable from the jump starter.
Note: If your car doesn’t start after several attempts, the jump starter might enter a safety mode to prevent overheating. Wait a few minutes and try again.
Using the In-Vehicle Method
Some jump starters allow you to start the car from inside the vehicle using the 12V accessory port (the socket that looks like a cigarette lighter). Here’s how:
Step 1: Turn off everything in your car, like the radio, air conditioning, and lights, to save power.
Step 2: Plug the 12V jumper cable into the jump starter.
Step 3: Insert the other end of the 12V jumper cable into the car’s accessory port.
Step 4: Watch for the jump starter to indicate it’s ready (this may take up to 15 minutes). For some models, a display will show “Output Ready.”
Step 5: Try starting your vehicle. If it starts, unplug the 12V jumper cable from the accessory port and the jump starter.
Note: If the car does not start using this method, try the direct-to-battery method.
Additional Safety Tips
Jump Starter Safety Guide: 5 Do’s and 5 Don’ts
5 Do’s When Using a Jump Starter
- Do Read the Manufacturer’s Instructions:
- Always read and follow the instructions provided by the manufacturer for your specific jump starter model. Each model may have unique features or safety requirements.
- Do Wear Protective Gear:
- Wear safety glasses and gloves to protect yourself from sparks or accidental contact with battery acid while handling the jump starter.
- Do Ensure Proper Connections:
- Connect the red clamp to the positive terminal (+) and the black clamp to the negative terminal (-) of the car battery. Double-check that the clamps are securely attached to avoid sparks or electrical shorts.
- Do Use the Jump Starter in a Well-Ventilated Area:
- Make sure you are in an open or well-ventilated space when using a jump starter to avoid the buildup of harmful gases that may be released from the battery.
- Do Keep the Jump Starter Fully Charged:
- Regularly charge your jump starter to ensure it is always ready for use in an emergency. Aim to recharge it after every use and at least every three months if unused.
5 Don’ts When Using a Jump Starter
- Don’t Use a Damaged Jump Starter:
- Never use a jump starter with visible damage, frayed cables, or any signs of wear and tear. A damaged device can pose serious safety risks, including electrical shocks and fires.
- Don’t Mix Up the Clamps:
- Never connect the red clamp to the negative terminal or the black clamp to the positive terminal. Incorrect connections can cause sparks, damage to your car’s electrical system, or even explosions.
- Don’t Use in Wet Conditions:
- Avoid using the jump starter in rain or snow or in wet environments. Moisture can increase the risk of electrical shock or short circuits.
- Don’t Place the Jump Starter Near Flammable Materials:
- Keep the jump starter away from gasoline, propane, or other flammable materials. Jump-starting can produce sparks that could ignite these substances.
- Don’t Leave the Jump Starter Unattended:
- Do not leave a jump starter connected to a vehicle’s battery unattended. Stay with your vehicle while jump-starting to monitor the process and quickly address any issues.